Plant Pigment Chromatography
Project Goal + Timeline
In this project, we will be reviewing your knowledge of photosynthesis by conducting a paper chromatography experiment. Most leaves are green due to chlorophyll; this substance is important in photosynthesis (the process by which plants make their food). In this experiment, we will test for various pigments present and separate the pigments using paper chromatography.
Plants produce their own food with the presence of sunlight and carbon dioxide. For photosynthesis to occur, plants contain a green pigment called chlorophyll that absorbs specified wavelengths of sunlight. Chromatography is a process that separates pigment molecules because each pigment has its own solubility levels for a certain solvent (we will use isopropyl alcohol for this task). The most soluble pigment moves farthest when compared to the less soluble pigment. In this experiment, you will use paper chromatography to determine what plant pigments are present in green and red leaves.
This project should be completed by yourself or within a group in a two-hour time frame.
Directions
Part 1: Test Your Knowledge
-
Which of the following is a green pigment that is present in most plant cells and gives plants their characteristic green color?
-
carotenoid
-
chlorophyll
-
chloroplast
-
stroma
-
-
Write the products and reactants of photosynthesis.
-
Where is chlorophyll found in a plant cell?
-
cell wall
-
cytoplasm
-
nucleus
-
chloroplasts
-
-
Make a prediction. Why do some leaves appear green in the warmer months and then red/orange in the fall?
Part 2: Conduct Your Experiment
Set up your experiment for both a green and red leaf by following these steps. Use the photos as a guide. Spinach leaves provide the best result for this experiment. However, you may be able to find green leaves from any nearby plant. Find another plant nearby with leaves of another color, preferably red. Please be sure to wear long sleeves and pants when collecting leaves.
-
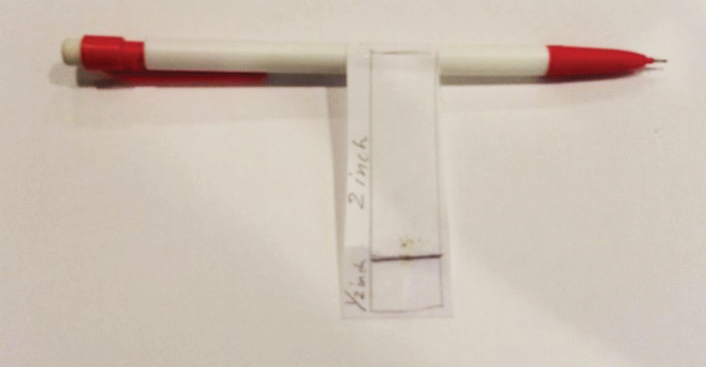
Cut a 2 ½ inch strip from a coffee filter and use a ruler to measure and draw a light pencil line ½ inch above the bottom of the coffee filter strip.
-
Tape the top of the paper strip to a pencil so that the end of the strip with the line hangs down.
-
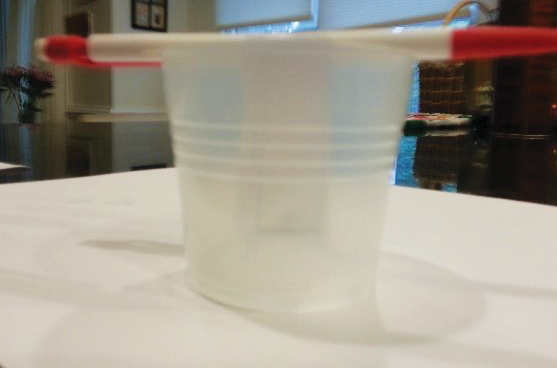
The pencil should be able to sit across the top of the clear cup with the bottom of the paper strip just touching the bottom of the cup.
-
Cut off any excess paper from the top of the strip if it is too long. Be careful to not cut the bottom of the strip with the line.
-
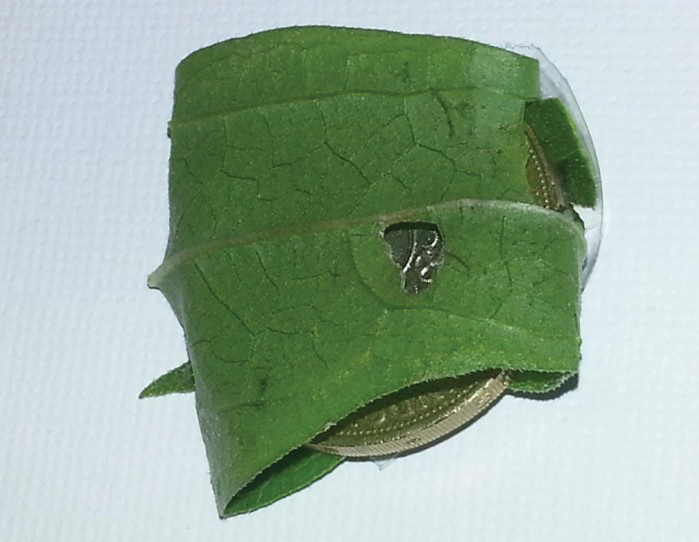
Wrap a leaf around a coin with the waxy side of the leaf facing outward.
-
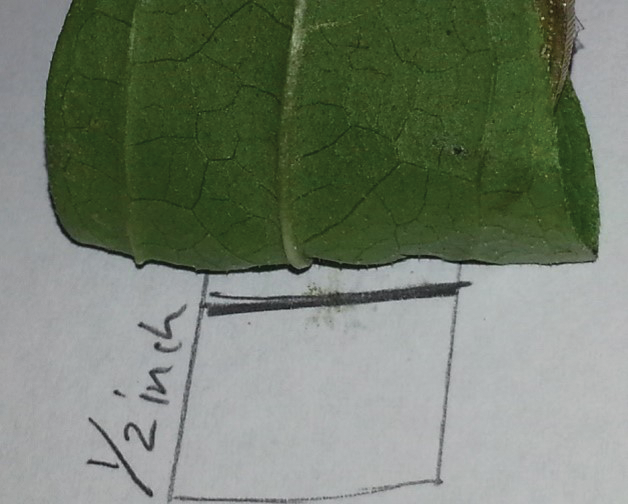
Rub the leaf along the pencil line on the coffee filter strip until you make a dark green or red line. Do not rub the leaf above or below the line. Rub the leaf on the line only.
-
Remove the pencil/paper strip from the clear cup for now.
-
Carefully add isopropyl alcohol to the cup until it reaches a depth of ½ inch. Lay the pencil across the top of the cup with the paper strip extending into the alcohol. Make sure that the level of the alcohol is below the green or red line on your paper strip. If the alcohol is going to cover the green or red line, pour out some alcohol before you get the line wet.
-
Observe as the alcohol gets absorbed and travels up the paper strip. This may take up to 20 minutes. Do not touch your experiment during this time.
-
When the solvent has traveled to within 1 cm of the top of the paper, remove the paper and mark the furthest point that the solvent traveled. Allow the paper to dry.
-
Using colored pencils or crayons, draw your results in Table 3. Be sure to dispose the material in an environmentally safe manner.
Part 3: Document Your Results
Complete the following observation tables for both the green and red leaf. Line/Pigment 1 is the mark closest to the bottom of the paper. Use your ruler to measure the distances.
| Line/Pigment | Distance from Bottom of Paper (inches) | Color Observed |
|---|---|---|
| Pigment origin | 1.5 | N/A |
| 1 | (blank) | (blank) |
| 2 | (blank) | (blank) |
| 3 | (blank) | (blank) |
| 4 | (blank) | (blank) |
| 5 | (blank) | (blank) |
| Line/Pigment | Distance from Bottom of Paper (inches) | Color Observed |
|---|---|---|
| Pigment origin | 1.5 | N/A |
| 1 | (blank) | (blank) |
| 2 | (blank) | (blank) |
| 3 | (blank) | (blank) |
| 4 | (blank) | (blank) |
| 5 | (blank) | (blank) |
Sketch your two chromatograms for each leaf in the following table. Be sure to label the colored lines with distance.
| Use colored pencils or crayons to draw your observations in the spaces below. | |
|---|---|
| green leaf | (blank) |
| red leaf | (blank) |
Part 4: Analyze Your Results
-
Did the leaves you tested contain different pigments?
-
Why is paper chromatography an appropriate technique for determining if different pigments are present in a leaf?
-
From your results, what are the two major types of pigments observed? How does each contribute to the process of photosynthesis?
-
Based on your results, explain why leaves tend to change color. Leaves in New England change color in autumn. However, leaves in Florida do not change colors in the same way. Why is this? (Hint: Think of a difference between the two locations that might act as a trigger for leaves to change color in the fall.) Could this be an evolutionary adaptation for the leaves? How so?
Project Materials
-
Coffee filter
-
Ruler
-
Scissors
-
Pencil
-
Colored pencil or crayons
-
Scotch tape
-
Green leaves (spinach yields the best results)
-
Red leaf (or color other than green)
-
Coin, such as a quarter
-
8 oz clear plastic cup
-
70% isopropyl alcohol (rubbing alcohol)